Alana
Oh marshmallows, where to begin? I have been avoiding writing this post since I began my marshmallow ordeal. The idea behind my hot chocolate & marshmallow project was to give away jars of homemade hot chocolate mix with an accompanying bag of marshmallows as Christmas gifts. The hot chocolate half of this project worked out swimmingly, unfortunately I cannot say the same for the marshmallow portion.
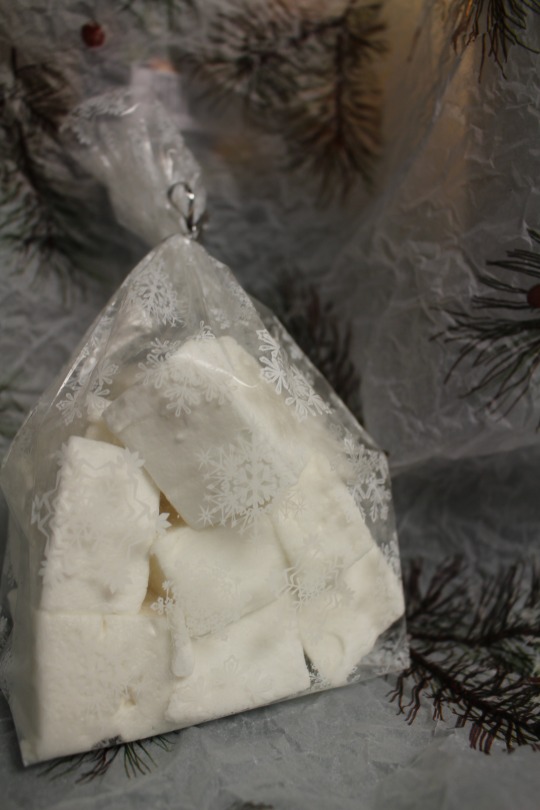
This photo is for keeping up appearances only, and does not at all reflect the real fiasco that was marshmallow making.
Overall I wouldn’t say that the marshmallow recipe I used was difficult to follow. To the contrary, I would actually say it was quite an easy recipe to make. How I managed to do such a bad job, I do not know. The recipe in question is off of Shauna Sever’s blog, aka “The Next Door Baker” as she states on, well, her blog. I figured that it should be a solid recipe considering she published an entire book on marshmallows.

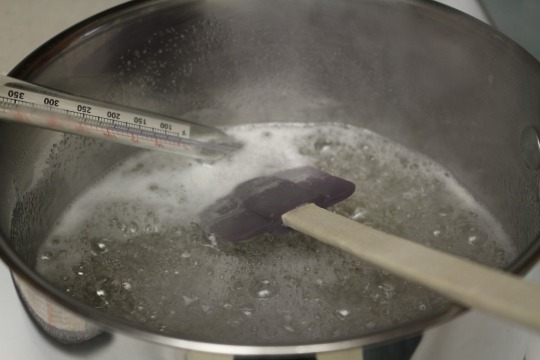
I will admit that my first batch actually turned out really well. I thought I messed up the whole thing when I wasn’t paying attention to my syrup, and cooked it to too high of a temperature. My understanding of candy making is that you actually need to be quite precise when it comes to heating your ingredients, so I found it quite odd that my best product was a result of my inattention. Was the tip of my thermometer was to close to the bottom of the pan? Is it inaccurate? Who knows. Anyways, when I transferred my marshmallow fluff into the pan to set, it felt like I was scooping and spreading soft marshmallows. Win! I let them set for a couple days, and they cut into cubes like a dream. My subsequent marshmallow attempts were unfortunately less successful. My second batch was abysmal; my third (and final) batch was mediocre.

After my initial success, I was overconfident. I decided that it would be a good idea to double my recipe in order to save myself some time. Everything was fine up until I was whipping my candy syrup. Past a certain point there was just too much volume and my mixer could no long incorporate air into the fluff effectively. I attempted to remedy the situation by removing some of the fluff from the bowl, but to no avail. Feeling foolish, I tried to set the fluff in a pan anyways.

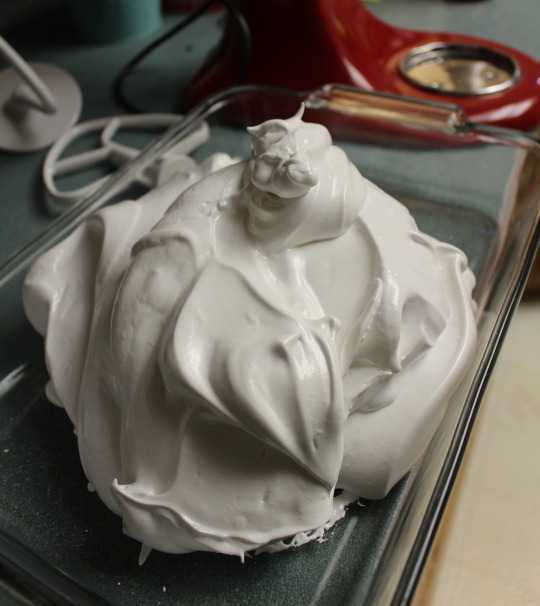
Nice and fluffy, but not marshmallowy when spread 😦
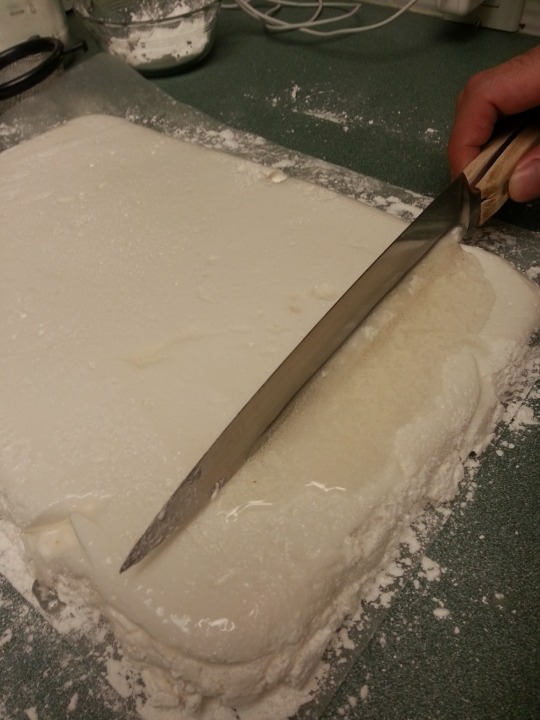
Each time I tried cutting my marshmallow slab into cubes, it was just too sticky on the inside. I left them to set in hopes that they would firm up a little bit more. Those marshmallows sat on the counter for days, as my intermittent attempts at cutting the slab continued to fail. By the end of the week I got a bit fed up and turned them out onto my counter. Turns out there was a big layer of sugary liquid collected beneath my marshmallow slab, all along the bottom of the pan. Gross. After scraping the liquid off, I dusted the whole thing with marshmallow coating and left them to dry out a bit more. The outer developed a thin crust, while the inside remained just as sticky. Epic marshmallow fail.

The day after making my disaster batch of marshmallows, I made my third attempt. I decided I would stick to the recipe like I did with the first batch, hoping that I would get marshmallows similar to my first batch. So I happily went about measuring my ingredients and boiling my syrup, but when I got to the whipping stage I was disappointed once again. My fluff was not puffing up like the first time. It wasn’t quite as bad as my second batch, so I figured “why not” and spread it into a pan to set. I left my marshmallows to set for a couple days before even getting close to them with a knife. They were very sticky and had less spring to them, but I managed to cut them with a sharp knife. I covered them with with marshmallow coating just like you’re supposed to, but they ended up becoming dry on the outside like the second batch. (Not as bad though).
Marshmallow goop. Not the most appetizing.
So overall, this marshmallow business was a bit of an ordeal. A small part of me thinks I should give marshmallows a second chance, but I’m not sure I’m ready for another emotional blow of that magnitude. The marshmallows that went well were absolutely superior to anything you can buy in the store, and received seriously positive feedback from the friends who were fortunate enough to actually receive said marshmallows. If you’re feeling ballsy, I have included the recipe below.
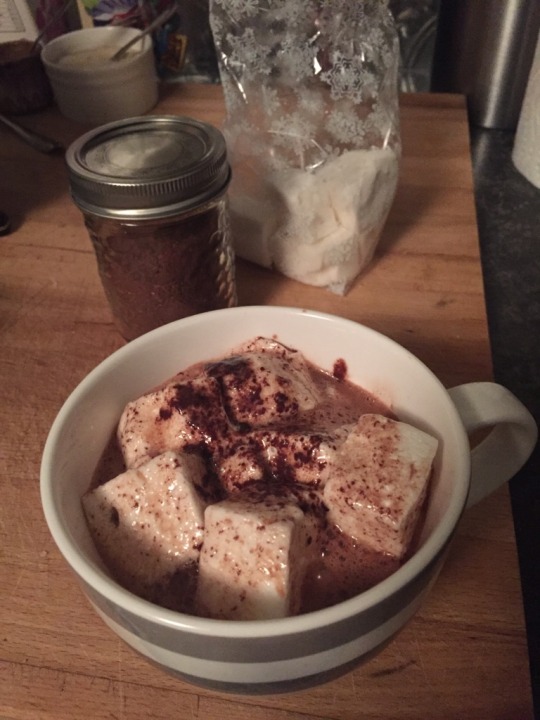
Evidence of hot chocolate-marshmallow success!
Classic Vanilla Marshmallows
Adapted from ShaunaSever.com
Ingredients:
4 ½ teaspoons unflavored powdered gelatin
½ cup cold water
¾ cup granulated sugar
½ cup light corn syrup, divided
¼ cup water
1/8 teaspoon salt
2 teaspoons pure vanilla extract
½ cup Classic Coating*, plus more for dusting
Method:
- Prepare an 8 x 8 inch baking pan by coating it with cooking spray (I like using shortening, personally).
- In a small bowl, whisk together the gelatin and cold water. Let sit for 5 minutes so the gelatin will bloom.
- In a medium saucepan stir together the sugar, ¼ cup of the corn syrup, water, and salt. Bring to a boil over high heat, stirring occasionally, until the temperature reaches 240 degrees F.
- In the meantime, pour the remaining ¼ cup of corn syrup into the bowl of a stand mixer. Microwave the gelatin on high until melted (approximately 30 seconds). Pour into the stand mixer bowl, and mix on low using a whisk attachment.
- Once the syrup reaches 240 degrees F, slowly pour it into bowl with the gelatin-corn syrup solution. Mix on medium speed for 5 minutes, then increase the speed to medium-high and mix for another 5 minutes. Add the vanilla and beat on the highest speed for 1-2 minutes. (The marshmallow fluff should have trippled in volume, and be white and fluffy).
- Transfer fluff into prepared pan, and spread evenly using an offset spatula. Sift classic coating evenly, and generously over the entire surface.
- Let set for at least 6 hours in a cool, dry place. Use a knife to loosen the marshmallow slab from the sides of the pan, and turn it out onto your worksurface (covered in classic coating). Dust with more classic coating and cut into your desired shap/size of marshmallow. Dip the sticky edges into (you guessed it) classic coating, and tap of the excess.
- If you managed to make it this far, sit back and enjoy some marshmallows. You damn well deserve it.
*Classic Coating
To make classic coating, which 1 ½ parts confectioners’ sugar and 1 part corn starch in a bowl
