Roopa
Happy Pride!!!
My buddy Marcus was staying with me over the long weekend, and after much deliberation, we settled on a cake project. I recently purchased some food grade silicone, so we planned to use that + my 3D printer to create a chocolate mold, as well as do a cool rainbow dripping ganache. The original plan involved an Arduino as well, so this is legitimately scaled back.

As you see, the cake looked nothing like how I described it… There were a few setbacks along the way. We salvaged it into something that looked reasonable, and definitely learned some things along the way.
LEMON CAKE (from Layered Cookbook)
INGREDIENTS
- 325 g cake flour
- 1.5 tsp. baking powder
- 0.75 tsp. baking soda
- 0.5 tsp. salt
- 170 g (1.5 sticks) unsalted butter, softened
- 300 g granulated sugar
- 2 tbsp. lemon zest (I used zest from 2 lemons)
- 0.75 tsp vanilla
- 1 egg
- 3 egg yolks
- 250 g buttermilk
- 15 g lemon juice
DIRECTIONS
- Grease and line 3 x 6″ cake pans. Set oven to 350 F.
- Zest and juice 2 lemons. Set aside.
- Sift together the cake flour, baking powder, baking soda, and salt. Set aside.
- In a stand mixer, cream the butter. Add in the lemon zest and granulated sugar and mix well.
- Add vanilla and eggs to butter mixture and mix well.
- Mix lemon juice and buttermilk together.
- Alternate adding the flour mixture and buttermilk mixture to the butter mixture in 3 batches, starting and ending with the dry mixture. Do not over mix.
- Divide evenly between the three cake pans (I use a scale) and bake for ~20 minutes. A toothpick should come out cleanly.
LAVENDER SWISS MERINGUE ICING (from Layered Cookbook)
INGREDIENTS
- 1 tbsp. whipping cream
- 1 tbsp. water
- 1 tbsp. lavender
- 120 g egg whites
- 200 g granulated sugar
- 340 g unsalted butter, softened and cubed
DIRECTIONS
- Mix together the whipping cream, water, and lavender. Set aside.
- Whisk together the egg whites and sugar in a stand mixer bowl.
- Heat up the egg whites with a double boiler while whisking periodically.
- When the egg whites reach 70 C, remove from heat and put into the stand mixer. Use the whisk attachment and whip at high speed for ~10 minutes (until cool to touch).
- Switch to the paddle attachment and add in cubes of butter one by one. Whip until glossy.
- Strain the lavender out of the cream and add the cream to the icing. Mix well.
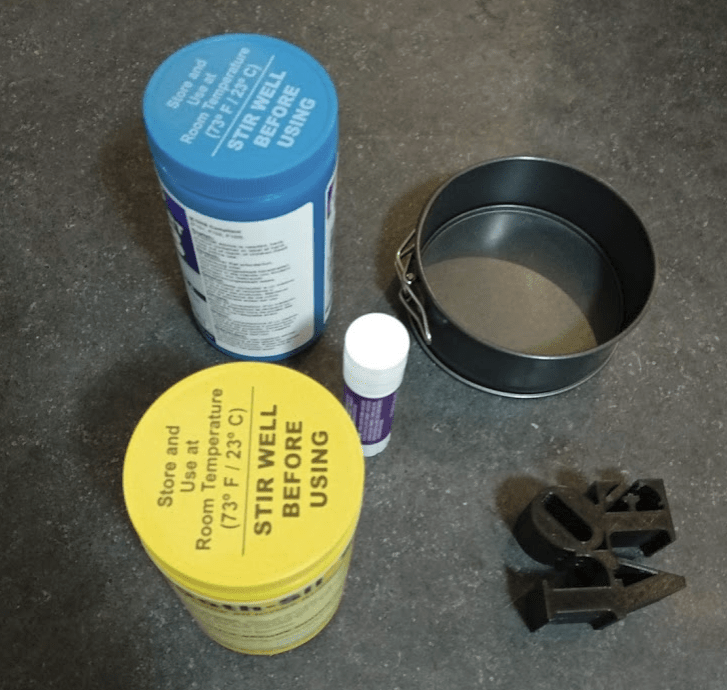
3D PRINT – SILICONE PROJECT
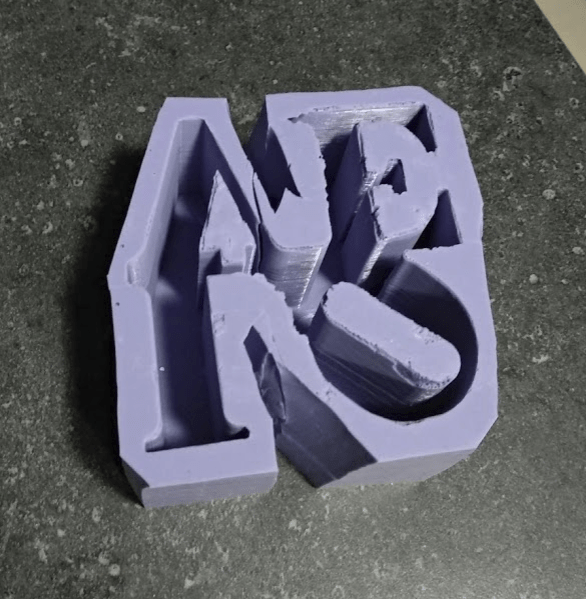
The goal was to 3D print a positive to pour with silicone, thereby making a negative chocolate mold. It was…almost a good idea!
We didn’t think through the manufacturing details of the whole thing, and ended up with a mold that was too deep with too many skinny parts and details. Next time I would choose a much shallower and geometrically simpler design. Also, the horizontal ridges on the print made it even more challenging to remove, so I would want to lacquer the print or do something equivalent. And the rips we made in the silicone to get the print out didn’t stop ripping.
Oh, and the chocolate was difficult to temper since my house was stuck at 30°C and 60% humidity, so the chocolate pretty much stayed at its working temperature.
sigh…
We also had intentions of doing a ganache drip down the side of the cake, but the temperatures were not working with us on this day, so we did a standard rainbow icing.

It was cool in theory, and we learned a lot, and it still tasted amazing, so I think it was relatively successful!

